A few interesting features of Vim, part 1

Almost every Linux installation includes the Vim editor. It’s far
from the only editor available for Linux, but it’s very ubiquity makes
it important. Vim is an extension of the traditional Unix
vi editor, but with many, many more features. Vim is my
preferred editor for programming, not just because I can rely on it
being available, but because it’s actually rather good. Of course, it
takes a bit of effort to be able to use it effectively, but that’s true
of most powerful tools.
I doubt that anybody who uses Vim needs every feature it offers. However, there are some features that don’t seem to be widely known, and which can be quite useful. In this article I’ll begin to uncover some of them.
Please note that I won’t be describing anything that needs particular plug-ins or extensions. There are many, very powerful plug-ins for Vim, and it’s certainly worth seeking them out if you can’t make Vim do something you want. Nevertheless, in this article I’ll only be discussing things that every installation of Vim should be able to do.
These suggestions are in no particular order, but some of the later ones do rely on earlier ones, in order to make sense.
Using horizontal splits
Personally, I don’t find it helpful to run Vim with many buffers and splits, although it’s possible. Still, it’s useful to understand the basics of splits, because so many other features rely on them.
If you’ve opened a file full-screen in Vim, you can open another file using
:n(ew) {filename}By default this will split the screen horizontally, putting the new file into a screen region above the existing one.
You can select which split is active using various
ctrl-w keystrokes, of which Vim has a profusion. Since I
use relatively few splits, I’ve found the easiest keystrokes to remember
are ctrl-w followed by an arrow key. This activates the
split in the direction of the arrow (and so works with both horizontal
and vertical splits).
Another useful key combination is ctrl-w, o which shows
the current split region full-screen. You can restore the split using
:sp, which will show the same file in both split regions,
followed by ctrl-^, which loads the previous buffer into
the split. These kinds of operations get increasingly fiddly when you
have more than one split.
Filtering lines in log files
Suppose you want to see all the lines in a log file that contain the
text WARN. This is a good application for the ‘global’ (g)
command. This command applies a regular expression to each line in the
buffer, and executes a (Vim) command on each matching line.
With no command, g just feeds the matches to a pager.
So, for example:
:g/WARNselects all the lines matching WARN and passes them to a pager. You can scroll the pager, but you can’t edit the results, or switch back-and-forth between the original and the filtered version.
To apply the change more persistently, you can run g
with the d(elete) command. However, in this case, we want
to delete non-matching lines. We can use either
:g!/WARN/dor
:v/WARN/ddepending on which form is easier to remember – they work identically.
These commands delete all lines that do not match WARN, and leaves
the remainder for regular editing. You can restore the missing lines
just with the undo (u) operation. What you can’t
easily do, however, is to make edits to the lines that contain WARN, and
then restore the missing lines. The undo command will just undo your
edits.
An alternative method for managing complexity, particularly in a structured document like source code, is to use folding, as described below.
Compilation and the quickfix list
Vim has specific support for running compilation commands, and
jumping to files and lines that contain errors. This support makes use
of the quickfix list, although there are other applications
of the quickfix list, unrelated to compilation, that I’ll touch on
later.
By default the command
:makeruns the ordinary make command, parses the results, and
puts matching error lines into the quickfix buffer. If there are errors,
you can run
:copento show the quickfix buffer. By default :copen splits
the window horizontally, with the quickfix buffer at the bottom. You can
use the ctrl-w commands, as described above, to cycle
between the split regions. More importantly, you can just select any
line in the quickfix buffer that begins with a filename and a line
number, and hit Enter. This will select the relevant file and line in
the source code buffer above the quickfix window.
If you don’t want to have the quickfix list open on screen, you can
still select error lines using commands like :cnext.
However, I’ve not found this very helpful, because I find that I need to
see all the nested error lines to understand the error.
You can change what command :make runs using ‘:set
makeprg=…’. However, whatever command you use must produce output in a
format that Vim can parse. I use Maven for compiling Java and, so far as
I know, :make can’t parse Maven’s output without additional
support. There are various plug-ins for this.
Searching for patterns in a source tree
When I’m writing code, I often leave notes for myself like this:
// TODO: add error checksSuppose you want to find all remarks like this, in all the source
files in your application, and edit the corresponding files. You could,
of course, use the ordinary grep utility in the console. A
nicer way is to use the grep support built into Vim. Its
format is similar to the command-line version, but you can’t (so far as
I know) pass arguments. To search for TODO in every source
file under the current directory You could do this:
:grep TODO **/*.c:grep also uses the quickfix list. So, after running the
command, you can use :copen to see the results, and jump to
the relevant places in the files where Vim found the pattern.
Like the ordinary command-line grep, :grep
searches for regular expressions, not just specific text. There’s an
alternative :Vimgrep that uses Vim’s regular expression
extensions (which need an article all to themselves).
Using an external code formatter
Vim has a built-in code formatter. To use it, all you have to do is
to select a block of text, and hit the = key. This formats
according to various built-in formatting parameters which you can
configure, to some extent. To format the entire file, you can hit
gg=G.
I find that I can’t get the ‘Whitesmiths’ formatting that I prefer, using only Vim. I can get close, but not close enough. In any event, external formatting tools will generally give better results than Vim’s built-in method, particularly when optimal formatting requires an understanding of the structure of the code, rather than just matching patterns. The differences are quite subtle, but sometimes preferable.
Moreover, sometimes I have to use other code styles than the one I prefer, particularly if I’ve working on somebody else’s project. Again, I find it easier to use an external formatting tool, particularly one that just takes the name of a style on the command line.
My preferred code formatting tool is clang-format. It
has built-in style names that I can just pass on the command line (e.g.,
‘--style=gnu’), but it can also take a style file, which
has several hundred parameters for controlling the format in fine
detail. With clang-format I can get exactly the
code layout I like.
Vim has a method to apply an external command to a region of text. The basic syntax is simply
:!commandSo, to run clang-format on the entire file you can
run:
:1,$!clang-format --style=gnuHere, 1,$ is a region specification, stretching from the
first line to the end of the file. Or, to use your own style file:
:1,$!clang-format --style=fileYou can also select a region of text, and just run the colon command on the selection, without needing to specify a region.
Vim expects the external utility to take text from standard input, and write the result to standard output. You can wrap up the command in a script, if it works in a different way. It’s sometimes helpful to use a script anyway, if the command is long, or has fiddly arguments.
This technique can also be used for decoding text in place, but this requires care. For example, I find in my work that I often have to look at configuration files where values are base64-encoded. For example:
text=SGVsbG8sIFdvcmxkCg==You might think that you could just select the encoded text, and then
run :!base64 -d. That doesn’t work, because Vim will always
output whole lines to the external utility. So, to use this
technique, you’ll have to first split out the encoded text onto its own
line.
Using marks to navigate a large file
I often find that I’m looking at a particular part of a source file, then I have to go and look at some other place in the same file. How can I get back to the original point?
One way to do this is simply to add some marker characters to the file at the original point and then, when you need to get back, just search for those characters. Of course, you have to use characters that don’t otherwise appear in the file and, of course, you have to delete them afterwards.
A less invasive method is just to use marks. There are some complications concerning the use of multiple buffers but, for simple applications, these need not concern us.
With that in mind, Vim supports 26 marks per buffer. They are denoted
by the characters a to z. So, to set mark ‘a’
on the current line, just enter ma. Then, to jump back to
that point, just enter 'a (that’s an apostrophe followed by
a). Of course, you can use the other letters to set other
marks; but I find it difficult to remember what they mean, when I use
more than two or three.
Entering special characters using digraphs
Your operating system or graphical desktop might provide other ways to get special characters, but the Vim method is platform-independent.
Digraphs are introduced using ctrl-k, followed by two
characters. You’ll see the character being built up on the status line.
Vim digraphs are kind-of logical. For example, to get é (‘e’ with an
acute accent) enter ctrl-k e '. The apostrophe has the same
general shape as the acute accent. To get è (‘e’ with a grave accent)
use ctrl-k e‘. The back-tick character, again, looks a bit
like the accent. An umlaut character (as in ’ö’) is signalled by the
colon (:) character, while the circumflex (as in ‘ô’) is signalled by
‘>’. Both these characters look a little like rotated versions of the
accents they stand for.
Not all digraphs are logical, though; and the ones that are may not
always be easy to remember. You can get a full list of digraphs by
executing :dig.
Managing complexity using folding
Folding is the process of temporarily hiding sections of a file. This can be particularly effective with source code, where there are clear markers of the beginning and end of a section.
For example, consider the long and complicated function definition
zip_read_header_from_cd below.
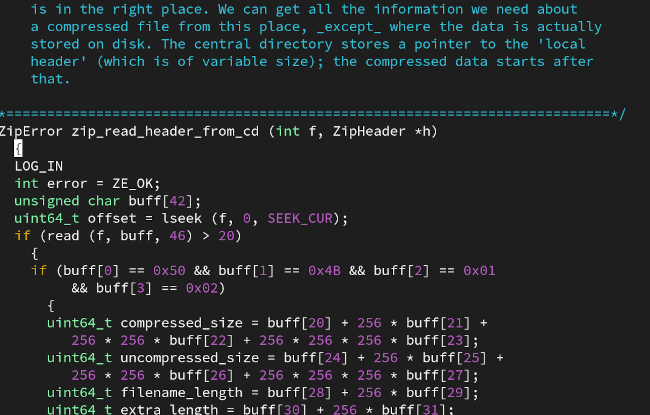
To hide the whole of this function, just leaving the definition in
place, select the opening brace character, and hit zf%.
zf means ‘create a fold’; the % specifies how
to move the selection point. This action will replace the whole function
body with a fold marker, as here:

The text is still present in the file, it’s just not visible. There
are many other ways to define the boundaries of a fold; you could, for
example, just select a text block and then do zf to fold
away the selection. Folds can even by nested, one inside the other,
although I don’t find nested folds easy to navigate in Vim.
To reveal the folded text, just move to the fold marker, and enter
zo (‘o’ for ‘open’). Interestingly, Vim remembers where the
folds are, even if you open them. So if you enter zc (‘c’
for ‘close’) in a region of text that is within a fold, the whole fold
closes again. Of course, you can’t actually see the fold boundaries, so
this only works in specific circumstances.
To open all folds, just hit zR.
Using abbreviations to speed things up
Vim supports abbreviations: when you type certain keystrokes, followed by a space, the keystrokes are replaced immediately by some other text. The replacement can be quite sophisticated: it might contain function calls, for example.
In practice, I use this feature for correcting words that I consistently mistype. One such word is ‘paramters’. To create an abbreviation spelling correction, I execute:
:ab paramters parameters(I had to turn this abbreviation off, in order to type the misspelled word into this page – otherwise Vim just corrects it).
Of course, commands like this are best placed in a start-up file, so they are always available.
It’s worth reading the Vim manual if you want to use abbreviations, because there are various subtleties about how they work in various modes.
Closing remarks
This article has outlined some powerful features of Vim, but there’s much, much more available. Features like folding and marks are rather more complicated than this article suggests, and do merit a close reading of the documentation.
Have you posted something in response to this page?
Feel free to send a webmention
to notify me, giving the URL of the blog or page that refers to
this one.

